Sign in and get started
Open portal.solvotix.org and sign in with your account.
What to do
- 1How to sign inUse email and password, or the available Google or Apple sign-in.
- 2How to reset your passwordSelect Forgot password to request a reset link, and check your spam folder.
- 3How to create an accountCreate an account only when your organization has asked you to do so.
- 4When to use Remember meUse Remember me only on a private, trusted device.
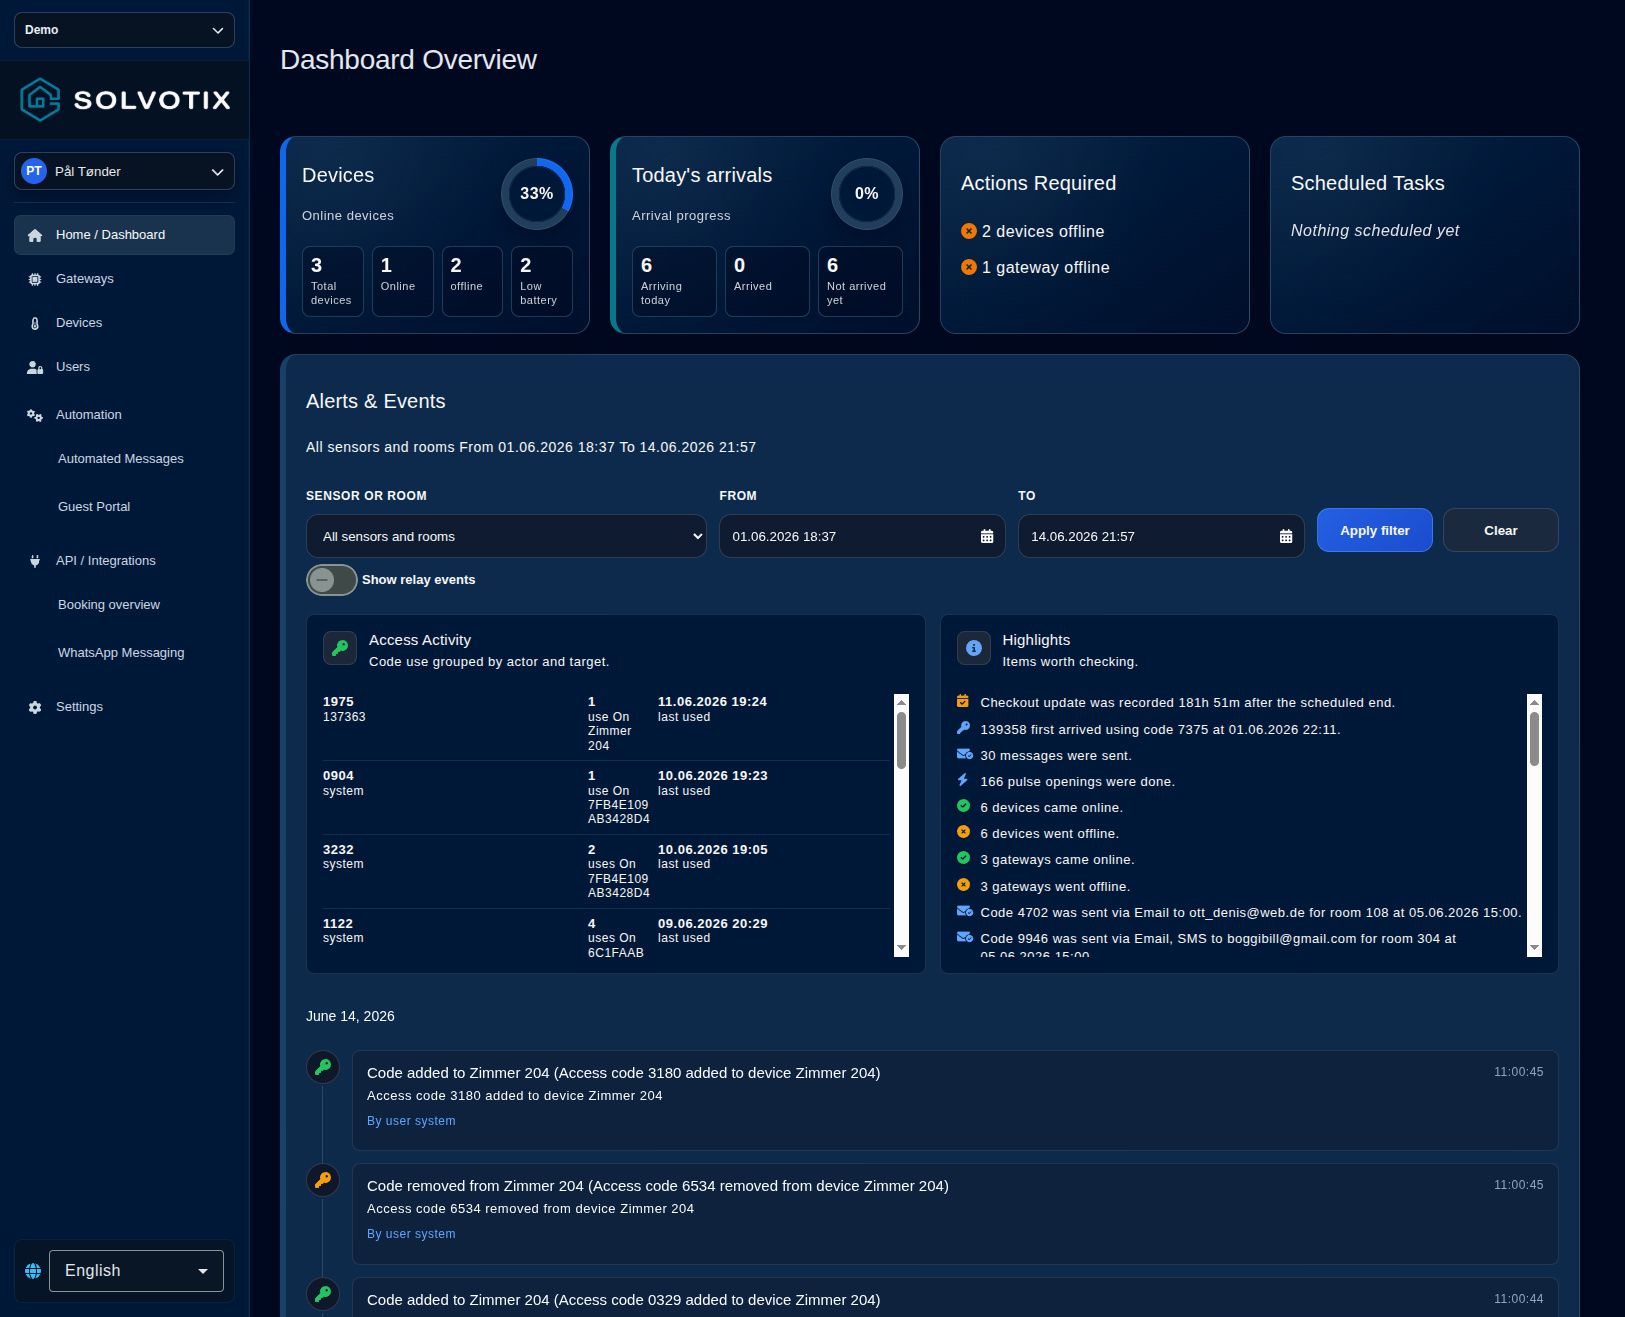
Understand the dashboard
The dashboard summarizes device health, arrivals, temperatures and recent activity. When no events match the selection, a card shows the same blue event-log illustration as the mobile app.
What to do
- 1How to check device healthReview totals for online, offline and low-battery devices.
- 2userManual.dashboard.gatewayCard.titleOn the overview, the Gateways card shows total, online and offline gateways and the online percentage. Select the card to open the gateway list.
- 3How to review today’s arrivalsCheck today’s arrivals and temperature cards when those data are available.
- 4How to handle required actionsUse Actions required to find offline devices or gateways.
- 5How to show relay eventsRelay on, off and pulse events are hidden from the timeline by default. Enable Show relay events when investigating power or opening commands. The switch changes the visible timeline; it does not change the selected target or date range. The overview uses the selected tenant’s timezone for event timestamps, timeline days, booking dates, today’s arrivals and date/time filters. Enter filter times in that timezone, even if your computer uses another one. Missing or invalid timezones fall back to UTC. Daylight-saving offsets are applied automatically: nonexistent times are rejected, and a manually selected repeated time uses its first occurrence. Saved filters are only restored for the same tenant and timezone.
- 6How to read the booking summaryWhen a room is selected, read Booking summary first. It uses the newest booking event in the result to show room, guest, status, code, start/end, contact details and check-in/check-out state. Missing fields mean they were not present in the event data.
- 7How to read access activityRead Access activity as grouped successful code use. Each row combines the same code, actor and target and shows how many times it was used and the latest use. The actor can resolve to a lock user, booking guest or portal user.
- 8How to use highlightsTreat Highlights as investigation clues, not separate alarms. They can identify late checkout, staff access after a booking ended, first guest arrival, sent access codes, message and pulse totals, and devices or gateways changing online state.
- 9How to navigate the timelineRead the timeline from top to bottom: events are grouped by day and newest appears first. Added MIFARE cards use blue formatting with a separate UID; accepted cards use green with UID and slot fields. Rejected cards use orange with Assign card, and removed cards use red. Current ranges refresh every two seconds; historical ranges are not polled.
- 10How to compare related eventsUse the timeline to correlate booking creation/update/deletion, messages, cleaning changes, valid or invalid lock use, device alarms, online/offline changes, gateway state and relay operations. Compare timestamps before deciding that two events are related.
- 11How to investigate an issueFor an investigation, start with the room and a narrow time range, then review Booking summary, Access activity, Highlights and finally the detailed timeline. If nothing appears, widen both dates and apply again; the previous filter is retained briefly when you leave and return to the dashboard.
- 12userManual.dashboard.item11.titleIn Alerts & Events, the first 40 entries appear initially. Scroll down to load the next 40 automatically, or select Load more events. Repeat until all entries in the selected time range are shown. New events continue to refresh at the top; if an older page fails, select Retry.
- 13Mobile event log and diagnosticsHome groups events by day and highlights new arrivals. Sensor/room, date and relay filters are remembered for each account and tenant. Date controls use dd.mm.yyyy and a 24-hour clock. New events are merged while the selected interval is current; pull to refresh for a full reload. Gateway diagnostics opens a separate message log with status, device and direction filters, expandable details and Refresh. Clear view hides earlier entries locally without deleting stored logs. Restricted accounts cannot read gateway diagnostics.
Monitor gateways
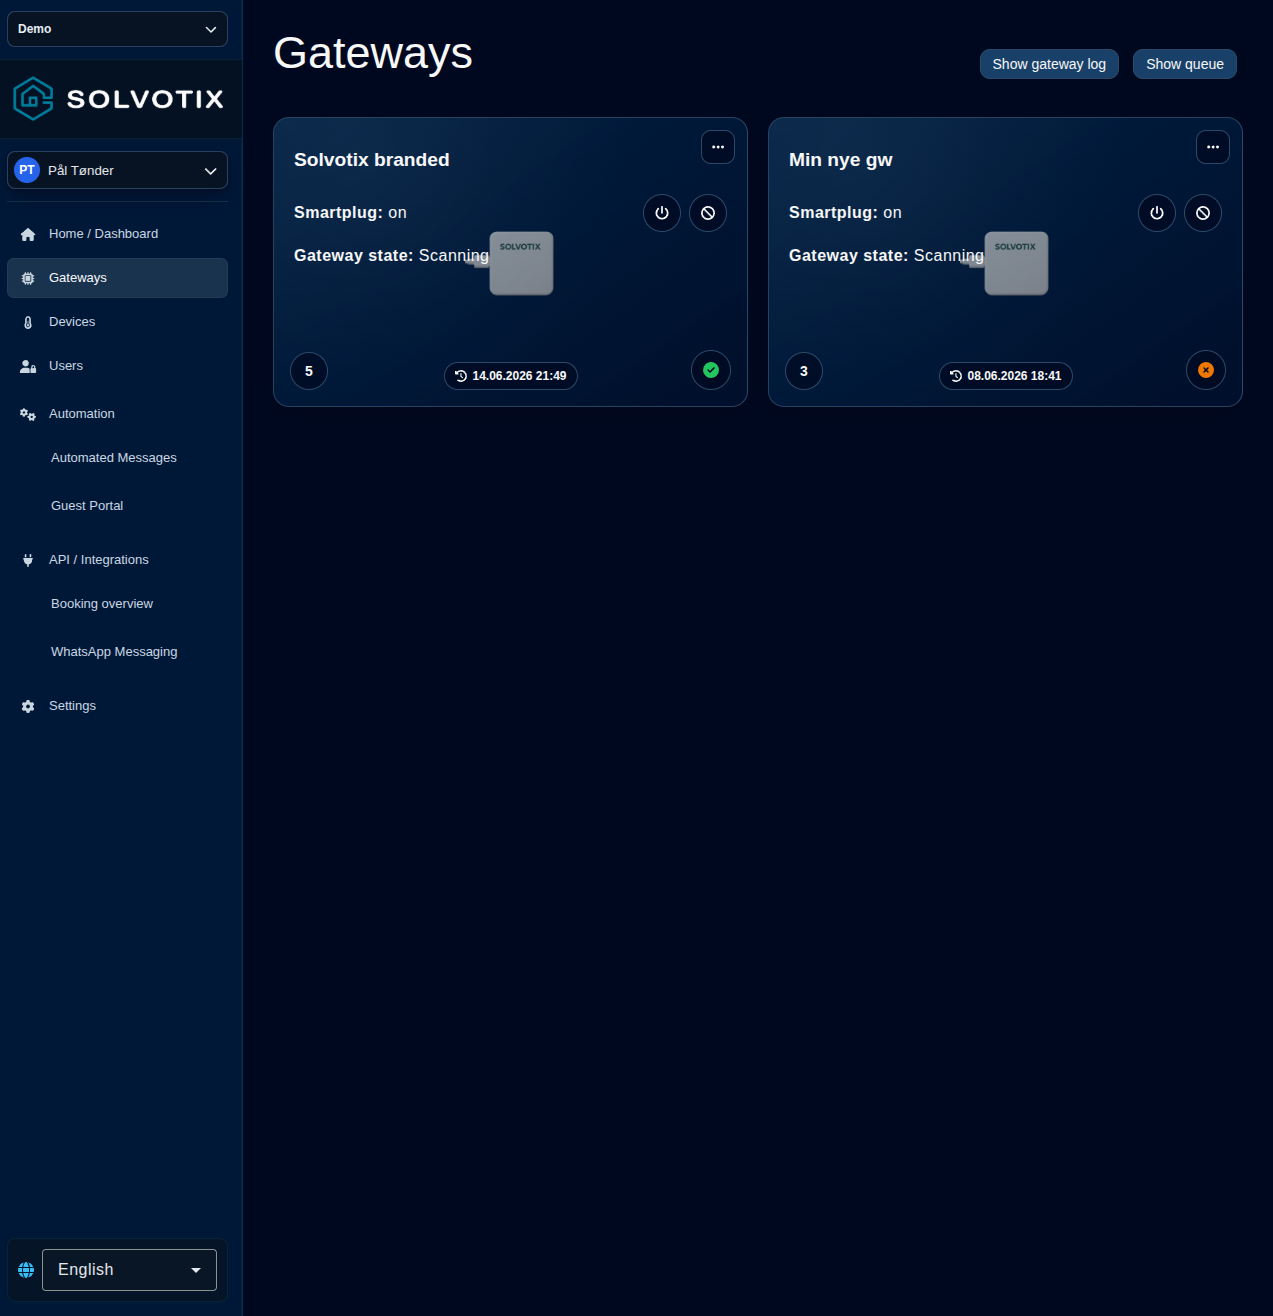
Gateways connect local Solvotix devices to the cloud and carry commands and status updates between them. One gateway can communicate with multiple devices, and one device can be reachable through multiple gateways. When more than one route is available, the system initially selects the suitable gateway with the strongest reported signal—not necessarily the one that is physically closest—to provide the most reliable connection. Empty gateway lists keep their existing illustration beside the heading in a gradient card matching Users, with a smaller image on desktop and a stacked layout on mobile.
What to do
- 1How to check online statusCheck the round indicator at the bottom-right of the gateway card. A green circle with a check means Online; a red or orange circle with an X means Offline. This status comes from the gateway’s online flag and refreshes with the page’s five-second polling. Do not use the Gateway state text alone to decide whether it is online.
- 2How to find the last contactRead the date and time beside the clock icon at the bottom of the card. This is Last heard from in dd.mm.yyyy HH:mm format. For an offline gateway, it shows the last time the portal received contact from it; it does not prove the exact moment power or network was lost.
- 3How to restart a gatewayTo restart, first confirm the gateway name and tenant, then select the clock/date button. The clock changes to a spinning restart icon and the button is disabled. Leave the page open: the portal polls every five seconds and stops the restart indicator when last contact, online status, or gateway state changes. Do not click repeatedly or restart during a firmware update.
- 4How to refresh connected nodesThe round number at the bottom-left counts the nodes in the gateway’s reported node list. Select the number to request Refresh connected nodes. Wait for the next automatic refresh and check whether the count changes. Gateway state may also show Connecting to node or Connected to node followed by the device name; a Close connection button appears while directly connected.
- 5How to control the relayRelay controls are shown only on gateway versions beginning with SmartPlug or SmartRelay. Read Smartplug: On, Off, or Unknown above the gateway state. Select the power icon to send Relay on or the prohibited-circle icon to send Relay off. The request is asynchronous, so wait for the displayed state to update before sending another command.
- 6How to read gateway stateRead Gateway state as the current operation: for example Scanning, Connecting to node, Connected to node, Connection closed, Disconnecting, Booting, or Upgrading firmware with progress. This operational state supplements—rather than replaces—the online indicator. On SmartRelay models, the small plug indicator separately shows whether main power is in use.
- 7userManual.gateways.item7.titleOpen Gateways → Gateway Log. The newest 40 protocol messages appear first; scroll down or select Load more messages to fetch the next 40 until the retained history ends. Status, node, direction, and gateway filters apply to messages already loaded; scrolling continues to fetch older messages. Refresh starts again with the newest page. Clear log hides earlier messages for this browser view; the server still retains its approximately one-day history.
- 8userManual.gateways.delay.titleIn a gateway’s Info dialog, under Edit gateway details, set Offline warning delay to a positive whole number of minutes and save. The default is 5 minutes. The timer starts with the last heartbeat; if no new heartbeat arrives, the gateway is marked offline and a warning is sent after the delay.
- 9Diagnose an offline gatewaySelect the warning on an offline gateway card. If it is lost, choose Yes to email a replacement request containing the tenant name, gateway name, description and ID to Solvotix support; once accepted, the portal removes and verifies the gateway. Choose No to decide separately whether to remove it, then confirm removal. If it is no longer needed, review the removal warning and confirm the correct gateway. If you have it, choose the light pattern first. A constant light leads to Wi-Fi setup. For occasional blinking, unplug the gateway, wait one minute, and plug it back in. Confirm when done to start a one-minute countdown; the guide detects when it comes online and closes. Three slow blinks in a repeating pattern can mean an update or an unavailable Wi-Fi network preventing backend communication. Allow updates to finish or check the network. To set up Wi-Fi again, hold the button for 10 seconds, open the Solvotix app, log in, go to Discover, press Discover, and choose Set up gateway. The direct link /home/gateways_diagnostics shows only offline gateways with the same cards and diagnostics. After the one-minute countdown reaches zero, the guide opens Wi-Fi setup and keeps checking for the gateway to return online.
Manage devices
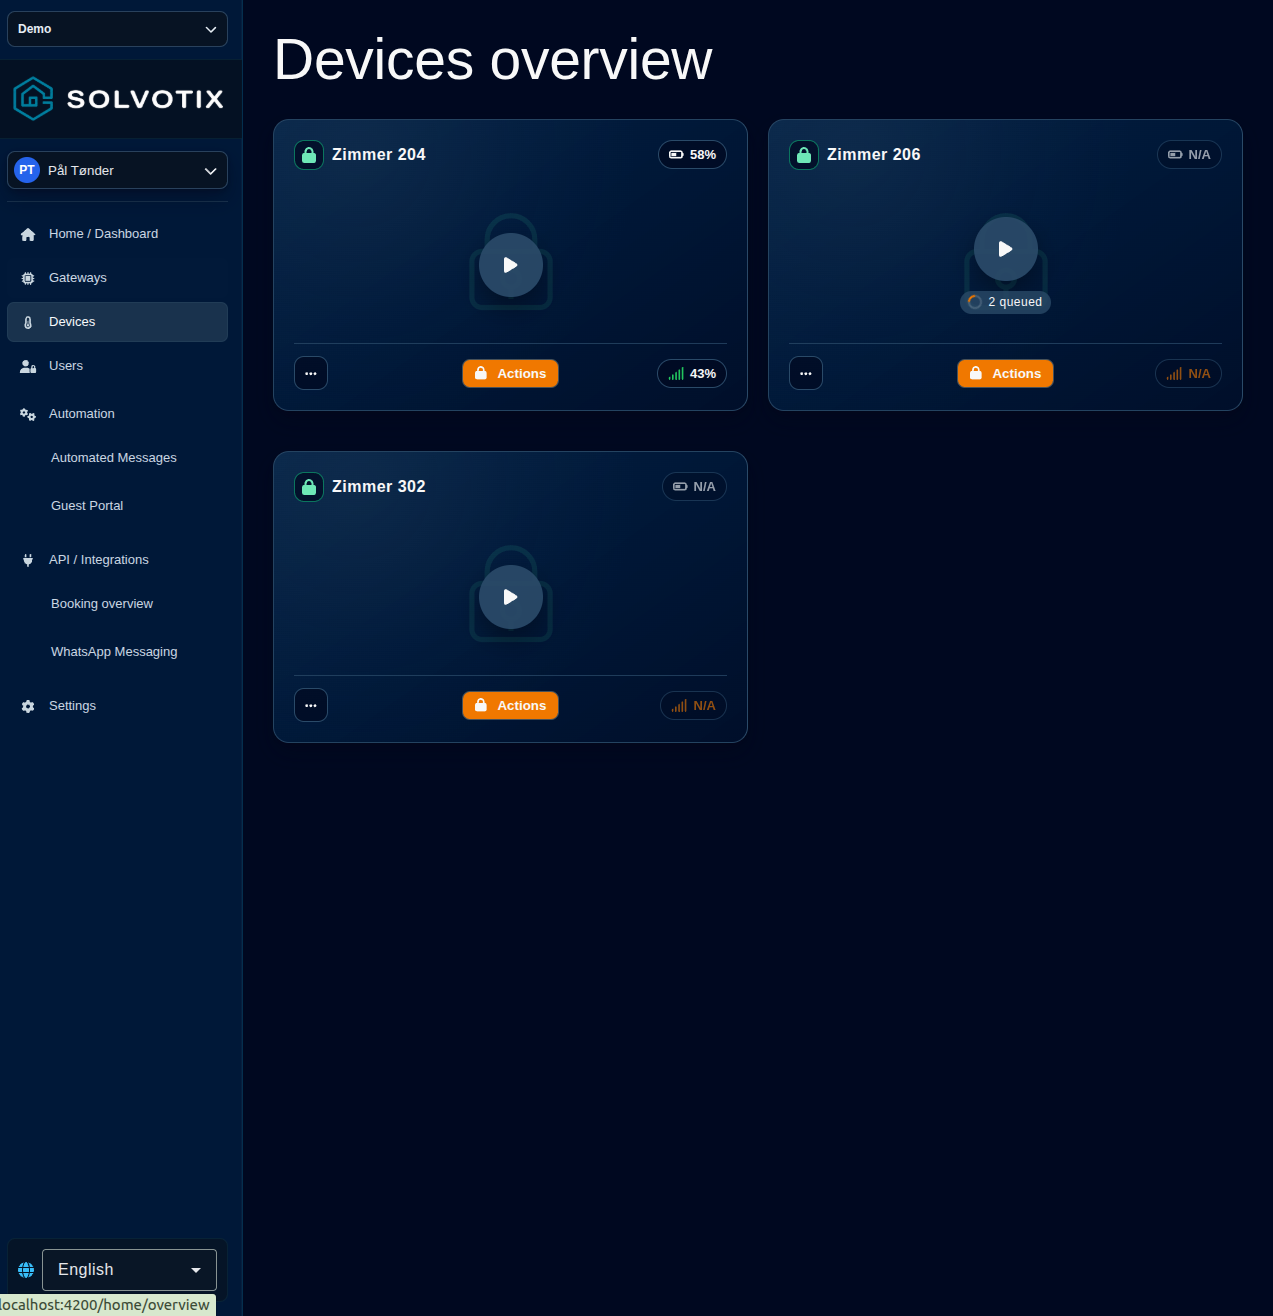
The Devices page gives you a complete overview of all locks, relays, thermostats and sensors in the selected tenant. From each device card, you can check its current status and use the controls available for that device type. The system supports any number of devices; when you have many, use the device-type groups and filters to quickly find and manage the equipment you need. When no sensors are found, the page keeps the existing illustration and shows it beside the heading and mobile-app instructions in a split gradient card, like Users.
What to do
- 1How to pulse open, open and closeFor a smart lock, select the large play button for Pulse open: the lock opens for its configured interval and then closes again. Select Actions for the separate Open and Close commands. Open leaves the lock open until a Close command is delivered; Close locks it. Each click queues a physical command, so confirm the device name and do not repeat a command merely because delivery is delayed.
- 2How to check online statusRead the signal icon at the bottom of the device card. Green means Online and red means Offline; the percentage beside it is the best gateway signal, not the battery. Select it to see signal strength by gateway. Offline means the portal cannot currently reach the device, so commands may wait in its queue.
- 3How the command queue worksOpen the three-dot menu and select Queue. Each row is a command waiting for this device and shows its action, optional sub-action, creation time and message ID. The backend delivers commands in order, one at a time per device, through an eligible gateway; it retries when no gateway is available, a gateway is occupied, or the device has not acknowledged delivery. An empty queue means no command is waiting—not proof that the physical action succeeded. Delete only a command you are certain must not run; Delete all cancels all still-pending commands, but cannot undo one already delivered.
- 4How to add a lock codeTo add a code manually, select Actions on the lock, find Code slots and select Add code. Enter 4–7 digits only—for example 4826—and confirm. If the lock already has codes, the new code must have the same number of digits as the first code. The portal allocates a free slot and queues Add codes; refresh the slots and wait until it is no longer shown as being added before giving the code to a guest.
- 5How to read and set temperatureOn temperature sensors, the large °C value is the current reading; the secondary value is humidity. Select the reading to open temperature history. On a wall thermostat, the card shows the measured floor temperature and the target temperature. Select Actions, enter the desired numeric target under Target temp and select Set target temperature. This is queued: wait for the target shown on the card to update before trying again.
- 6How to check the batteryRead the battery percentage at the top-right of devices that report battery level. Select it to open battery history. N/A means the device is offline, has not supplied a usable battery value, or battery reporting does not apply; it does not mean 0%. Treat a falling percentage as a trend and plan replacement before the device goes offline. Wall thermostats intentionally do not show this battery button.
- 7Mobile device status and historyIn the mobile app, firmware 115 or newer can show a green unlocked icon when a lock last reported being held open. This is not door position; timed openings do not set this indicator. Older firmware remains neutral. A shield marks encrypted communication. BLE profiles remain readable with encryption enabled, and a zero signal reading is not full signal. Tap a temperature reading for its history chart and latest readings. Firmware changes across version 111 warn about code migration and resending codes.
Manage lock users and codes
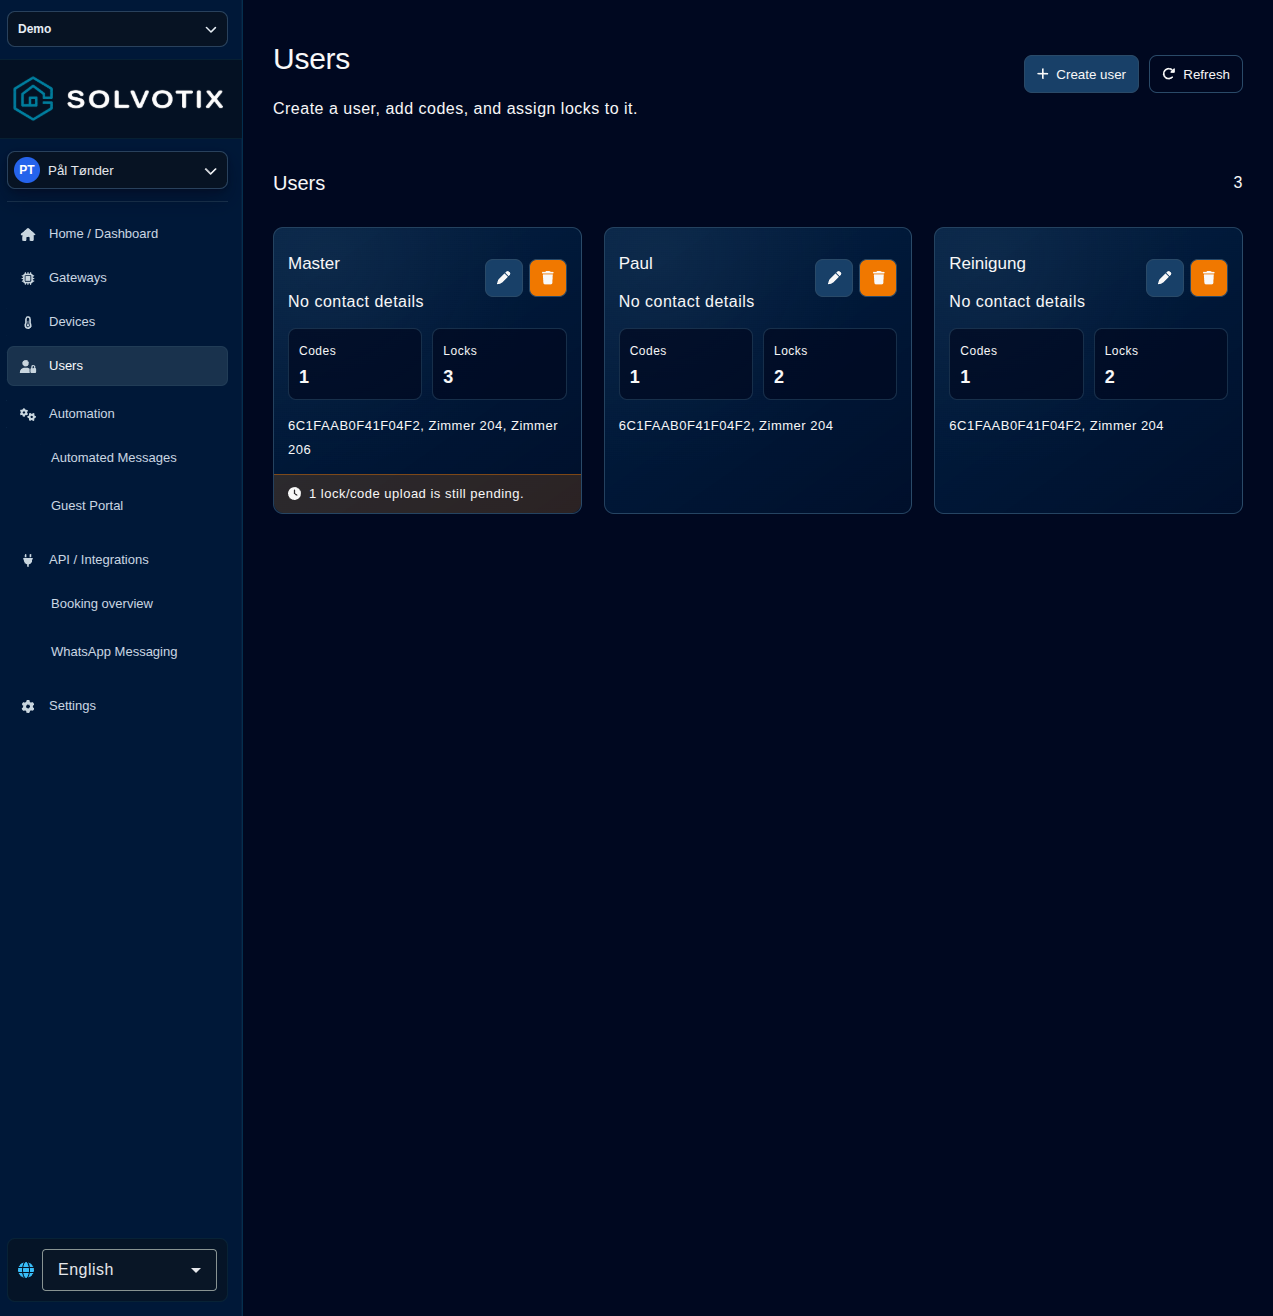
Lock users are access profiles for people who need ongoing access to selected smart locks, such as janitors, cleaning staff and other employees or members. Each profile combines contact information, PIN codes and assigned locks. Do not create lock users for guests; guest access should be created from their booking under Property Management so that it follows the booking period. The empty state keeps the blue profile illustration and places it beside the heading, description and Create user button in the same split gradient card as Rooms. The user count appears in a small chip immediately to the right of Create user.
What to do
- 1How to create a lock userSelect Create user and follow the three steps: first enter the required name and optional contact details, then add at least one unique 4–7 digit PIN code, and finally select every lock this person may use. Select Create user on step 3. Use Back to review earlier steps before saving.
- 2How to modify a lock userOn the user card, select the pencil. Change contact details, select a code chip to remove it, use Create PIN code to add another, and select or deselect locks. Review the selected count, then select Update lock user. Newly added code-and-lock combinations are queued for installation; removed combinations are queued for removal only when no other lock user or room still uses that same code on that lock.
- 3How to delete a lock userSelect the orange trash button on the correct user card, verify the name in the confirmation, and confirm. The profile disappears immediately. The backend then queues removal of its code from each assigned lock unless another lock user or room still references the same code-lock combination. Deletion therefore does not prove that the code has already left the physical lock.
- 4How to add or remove PIN codesThe credential step displays a warning until a credential is present. Existing users may continue with either a saved card or a unique 4–7 digit PIN. New users must add a PIN first because cards require the user to be saved before they can be added.
- 5How to assign locksIn step 3, select Select locks to open the lock-selection overlay. Choose individual locks or Select all, then select Done. The selected locks appear as removable chips in the main wizard; select a chip to remove it or Change lock selection to reopen the overlay. Confirm the chips before saving.
- 6How to understand code uploadingThe clock warning counts unconfirmed code-and-lock pairs. Names of locks with pending uploads are orange, without extra text beside each name. Numeric-code highlights use the affected devices reported by the backend, including when codes are masked. Card delivery is checked separately. The page refreshes pending users every two seconds and removes highlights after confirmation. Saving only queues delivery; do not promise access until it is confirmed.
- 7How to assign a rejected MIFARE cardFor a rejected MIFARE card event, select Assign card. The first dialog contains only Create user and Add to existing user. Create opens the normal Lock Users creation wizard. Add to existing asks which user to open, then opens that same wizard in edit mode. The rejected card is staged under credentials and the source lock is automatically selected.
- 8How to view and add cards on a lock userOpen a saved lock user with the pencil. MIFARE cards lists each card UID and whether it uses card-only or card-plus-PIN access. Select Add card, enter a 4, 7 or 10-byte hexadecimal UID and optional PIN, confirm, and queue it. New lock users must be saved before cards can be added. To remove a card, select its trash button, verify the UID in the confirmation overlay and select Remove card. The user is updated immediately, while physical removal from eligible locks remains queued.
- 9Assign a card from the mobile logAccepted, rejected, added and removed MIFARE cards have distinct event labels with UID and slot details. On a rejected card, choose Assign card, then create a lock user or select an existing user. Review the card, optional PIN and assigned 8015/S42 locks before saving. The PIN must contain 4–7 digits and match the lock's existing code length. Saving stores and queues access; it does not confirm lock delivery. Refresh delivery status to check pending card/lock assignments. After an uncertain save, refresh the user or check the user list before retrying.
Configure automation
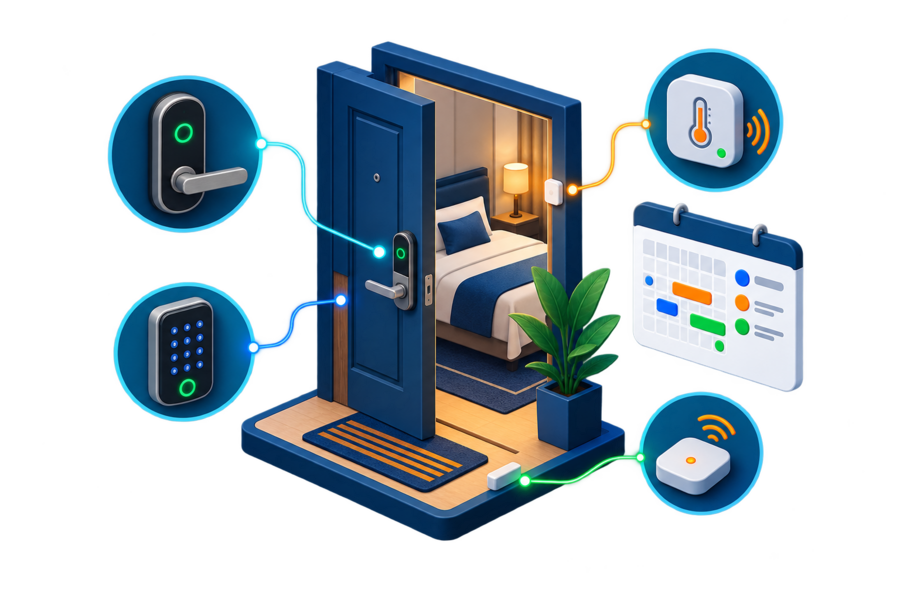
Automation brings recurring operational work into one place. Activate the modules your organization needs—such as automated SMS and email messages, power optimization and automatic temperature control—then configure their rules and monitor the resulting activity. Only activated modules appear for the selected tenant. When no modules are active, the page shows an automation illustration and a prompt to manage modules.
What to do
- 1How to activate an automation moduleOpen Automation and select Manage modules. Switch on Automated Messages, Power Optimization, Temperature Control or another required module, then save/close the dialog. Wait until the page shows Synced; the enabled module appears as a card with its Configure action and as an available navigation item. Switching a module off hides its interface, so review active rules before disabling it.
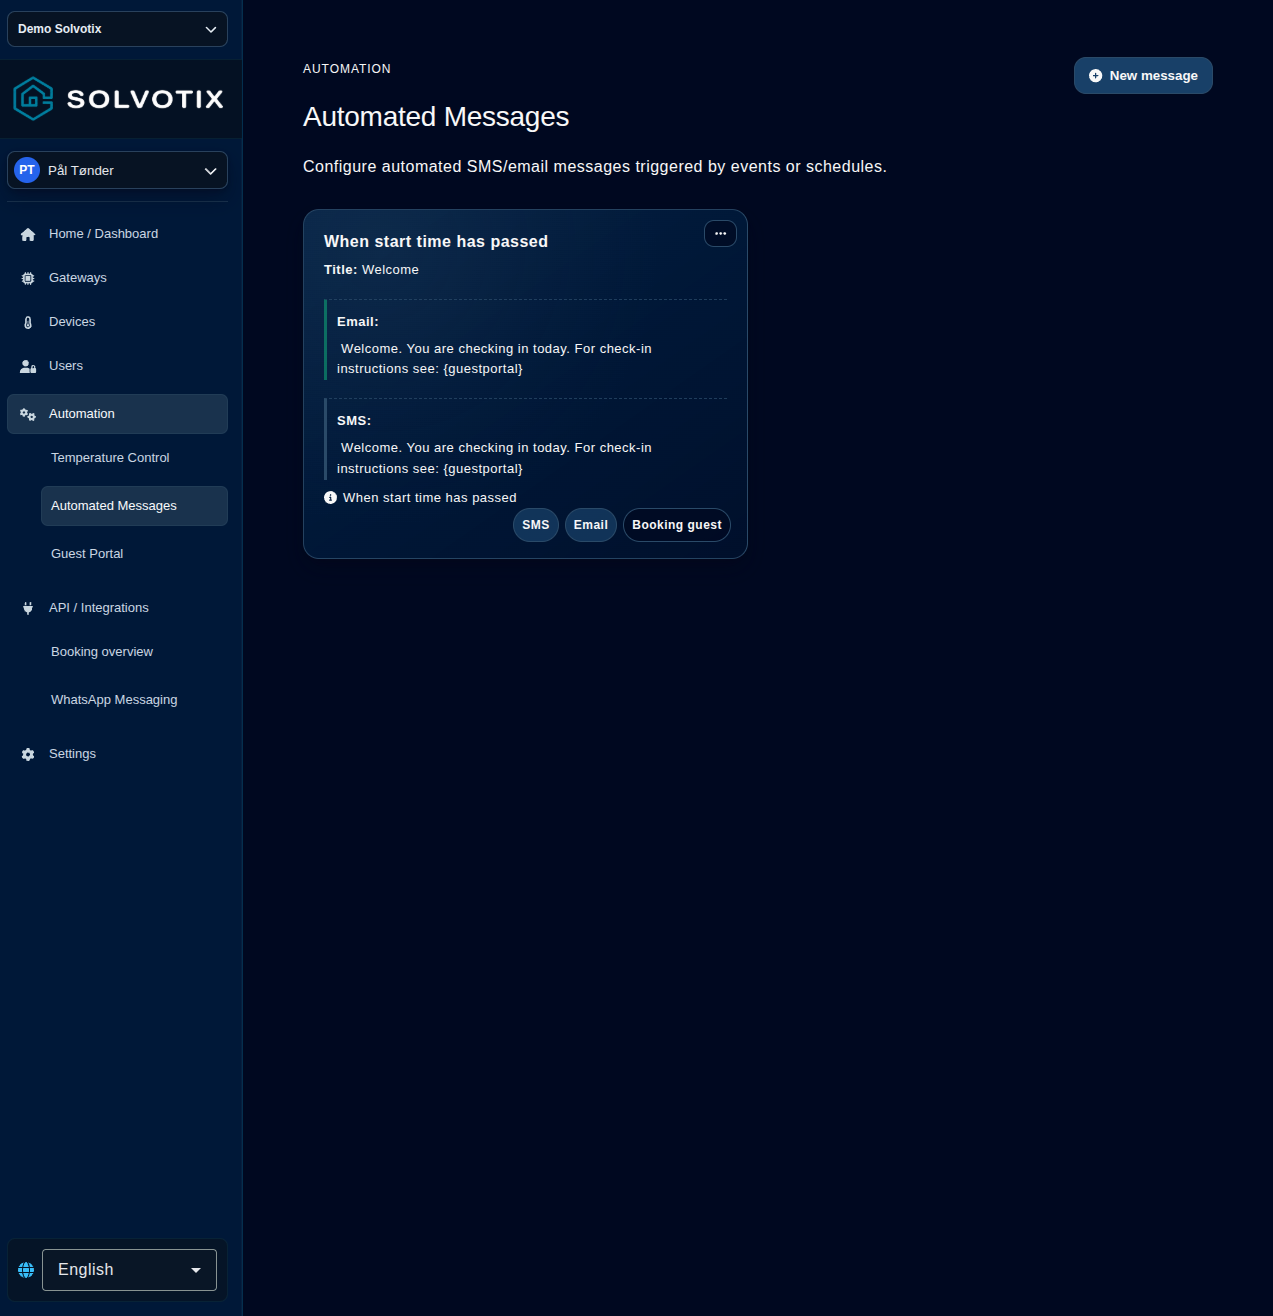
- 2How to create an automated messageOpen Automation → Automated Messages and add or edit a message. Under When and who, choose the trigger and Booking guest or Specific recipients. A specific recipient requires an address or phone number. Relevant triggers show a 24-hour hour/minute selector or Offset (minutes) beside the trigger. Under Message content, enable Email, SMS or both and edit each enabled channel in its tab. Email has a subject and body. Use the toolbar for templates, the guest-portal button or variable help. Delivery conditions is collapsed and appears only for booking guests. Room specific messages opens a separate draft editor with its configured count. Cancel discards dialog changes; Apply changes returns room edits to the main form. Save the main message to persist everything. Validation opens the affected channel and focuses the relevant field. Automated-message cards show email and SMS previews only for enabled delivery methods. The manual Send message dialog follows the selected template: email subject, address and preview appear only for email; phone and SMS preview appear only for SMS. Email content is rendered with line breaks and buttons directly in the dialog preview. Expand Edit — Email content to edit the HTML source; changes update the preview and are included when sending. SMS stays plain text. The dashboard event log renders Email message content as HTML, including line breaks, decoded characters and guest portal buttons. SMS messages and other event fields remain plain text.
- 3What each trigger meansOn day of arrival sends once on the booking start date at or after the selected tenant-local time; past arrivals are skipped. When start time has passed becomes eligible at booking start plus the minute offset, until booking end or checkout; rule edits do not exclude earlier bookings or resend delivered channels. On day of departure sends on the booking end date at or after the chosen local time. On booking created applies to bookings created after the rule was activated, before their start, and not already checked in/out. On check in applies while checked in and not checked out; sending also updates the booking start time to the send time. On checkout applies after checkout for up to 48 hours after the booking end. Template only stores reusable text and never sends automatically. Sensor alarm, alarm cleared, offline and online are offered by the configuration API, but the current backend dispatcher does not process them; do not rely on those four triggers until backend support is added and verified.
- 4What every message field meansTiming uses the tenant timezone. Offset (minutes) defaults to 0; -60 sends one hour before booking start and 60 one hour after. Delivery still follows recipient, payment, cleanliness and booking-validity requirements. Changing timing does not resend delivered channels. Use template replaces only the current channel body and leaves the trigger and other channel unchanged. Disabled channels keep their draft text. Room instructions support general and channel-specific text plus an optional language code; blank language means all languages. Use {roominstructions} in the main body to include the resolved room instructions. Available variables opens a separate help dialog; it is not displayed inline. Use these variables in the subject or message body when creating or editing a message. Both dates use the tenant’s timezone. {departureDate} uses the regional numeric format (Europe/Oslo: 18.09.2026; America/New_York: 09/18/2026). {departureDateText} gives 18 sep 2026, always with a lowercase English month abbreviation. Unsupported regions use yyyy-MM-dd for the numeric date. {arrivalDate} and {arrivalDateText} use the booking start date with the same numeric and text formats as the departure variables. Use {arrivalDateText} for arrival and {departureDateText} for departure. In Automation → Automated Messages, create or edit a message and enable email under Message content. Under Email message, place the cursor where the button should go and select Add guest portal button. A second dialog opens with the button label, background color, text color and Style preview. Choose Insert button to add it and return to the message, or Cancel to return without changing the email. Selected text is replaced; without a cursor position the button is appended. Defaults are action blue #1068F0 and off-white #F8F8F8. Colors accept #RGB or #RRGGBB; labels cannot contain double quotes or line breaks. The inserted {guestportalbutton} token stores your label and colors; edit it in the email body to change an existing button. The preview shows styling only and does not open a booking. Buttons require a booking and work only in email bodies; use {guestportal} in SMS and subjects. Save the message to retain the inserted button. Add guest portal button is beside Show templates. Room-specific messages are no longer edited in this message overlay. The guest-portal button dialog provides color pickers beside the background and text hex fields. Choosing a swatch updates the hex value and preview; the text fields still accept #RGB or #RRGGBB. The automated-message editor is one continuous view: trigger and delivery settings appear above the SMS and email fields, followed by templates, the guest-portal button and variable help. For booking-guest delivery, select Add rooms to the left of Add guest portal button and choose one or more rooms. A separate overlay opens with room checkboxes. Apply filter returns your selection to the message editor; Cancel or Escape discards the overlay changes. Save the main message to persist the selection. Selected rooms appear below the button row; remove a chip or deselect a room to change the list. Preview cards show room chips before SMS, Email and Booking guest. Save the message to apply the filter; Cancel discards edits. An empty list includes all rooms. Switching away from booking-guest delivery clears the room selection. Room filters are independent of room-specific message content. Expanding or clearing the filter can send to eligible unsent bookings. Warning 5, Room not included, means a due booking was excluded without another successful automated message; a successful delivery clears the warning. Use Select all to check every room, or Deselect all to clear the selection. With a partial selection, the button selects all rooms. Apply filter returns the changes to the editor; an empty selection means all rooms when saved. The room list uses natural alphabetical and numeric order in the portal language, ignoring letter case: Room 2 appears before Room 10.
- 5How to edit an automated messageOpen the three-dot menu on the rule and select Edit. The overlay loads the saved trigger, recipient, time, channels and content. Change the required fields and select Update automated message. Editing changes the activation time used by On booking created. Review the card after saving.
- 6How to delete an automated messageOpen the three-dot menu on the correct rule, select Remove, verify the trigger name in the confirmation and confirm. The rule disappears and no new automatic sends are created from it. Deleting does not recall messages already sent and does not remove their delivery logs. If you only need reusable copy without automatic delivery, edit the rule and choose Template only instead.
- 7How to schedule lock automationActivate Lock Automation under Automation > Manage modules, then open Configure lock automation and select New task. Name the task, pick one trigger — Open keeps locks and lock controllers open and holds relays closed, Close locks and opens the relay circuit, Pulse open opens briefly — and select the locks, lock controllers and relays it applies to. Set the schedule as Once, Daily, Weekly or Monthly with a repeat interval, weekdays or days of month, a time of day and a start date, plus an optional end date and time zone. The schedule runs in local time, so a task keeps its clock time across daylight saving changes; an 08:00 opening and a 16:00 locking are two separate tasks. Confirm the safety acknowledgement before saving, because the task operates physical access with no operator present. These endpoints are restricted to superusers, tasks only run while the module stays enabled, the scheduler polls once a minute so a trigger fires within about a minute of its time, and a missed occurrence is skipped rather than run late. Use the card menu to edit, disable or delete a task, and verify every executed and failed operation per device in the event log.
- 8How to activate and open the Energy AgentActivate Energy Agent under Automation > Manage modules. The module card then shows Open Energy Agent, and Energy Agent appears as its own entry in the left menu; while the module is off neither is shown. Solvotix Energy Agent runs as its own application on a separate subdomain, so the link opens in a new tab. You stay signed in: both applications share the same login, so no separate sign-in is required. Activation is stored per tenant, so switch tenant first if you want the module in another property.
- 9Run a lock automation task nowOpen Automation → Lock Automation and choose Run now from a task card’s menu. The task and Lock Automation module must be enabled. Confirm the named task, trigger and every target device before running it. The configured command is queued immediately for each device without changing the schedule; the card’s Last run date updates to this manual attempt. The result shows which devices were queued; queuing does not prove a lock or relay acted. Check the event log and physical state of each device. After a timeout, inspect both before trying again, because a command may already have been queued.
- 10Guest portal tenant nameThe guest portal displays the tenant name at the top, above the language selection and booking content. The name stays visible before and after the stay when available. If it cannot be loaded, the heading is hidden and the portal continues to work. On mobile screens, the guest portal shows large room and access-code cards side by side, and a full-width checkout card with the departure time. The information button explains when checkout becomes available. Hotel messages and the language selector appear below. Tenant visibility settings still apply; the desktop layout is unchanged. In a direction guide, Back returns to the main guest portal screen. On the day of departure, Report departure lets guests notify staff that they are leaving. Confirm departure submits the existing checkout action; the confirmation warns that room access will be deactivated after 5 minutes. This button does not confirm payment settlement. In Automation → Guest portal → Portal behavior, Show pre-stay instructions reveals a text field only while enabled. Enter instructions and save settings. Guests see the text on the closed portal before arrival only when Limit to booking valid time is also enabled and the booking has valid start and end dates and has not been checked out. Blank text stays hidden; instructions disappear during and after the stay. The same plain text is used for all rooms and languages, with line breaks preserved; HTML and template variables are not interpreted. These instructions do not enable early access to room codes or actions. Turning the toggle off hides the editor without erasing its text. Pre-stay instructions appear without a heading. Before the booking starts, the closed portal shows a live countdown in four framed panels for days, hours, minutes and seconds, with glowing digits and a subtle blue horizon. At zero, the portal automatically checks booking access with the server again before revealing booking content. The countdown appears above the stay details on desktop and mobile. If the opening time is unavailable or the stay has ended, the portal shows a status message instead. On mobile, the property name header is centered. Ask guests to confirm contact details is off by default. When enabled, an overlay opens once per page visit on both locked and unlocked portals until the booking’s contact details are confirmed, even if phone and email already exist. Existing values are loaded for review and correction. Select a country calling code for a new phone number; existing numbers can keep their stored format. Phone and email are both required. Continue displays both values for review; Confirm and save confirms them together. The portal reads the saved details back before reporting success. Confirmed details cannot be edited here and are not requested again. Conflicts reload the current details without overwriting confirmed values. Temporary failures allow retrying the same details. Maybe later dismisses the overlay; Confirm contact details reopens it. Confirmation does not verify ownership of the phone or email. Show pre-stay instructions is also off by default. Clicking outside the contact-details window or pressing Escape does not close it. Use Continue to proceed or Maybe later to dismiss it. A bright, translucent backdrop increases contrast around the contact-details window. On the closed portal, Confirm contact details appears inside the booking notice in place of Check again, only while confirmation is needed. The separate contact button remains on the active portal. On the unlocked portal on desktop, Confirm contact details appears at the top right beside the property heading. Mobile keeps the separate contact button. When Show pre-stay instructions is enabled, the closed portal before arrival also shows the stay details with the available check-in and check-out dates in the tenant’s timezone and regional format. This stay summary appears even if the instruction text is blank. Room and access-code cards respect their visibility settings but show only “Will be available when ready”; actual room names, numbers and codes remain hidden until access is allowed. The summary is hidden when the toggle is off, after the stay, or when the booking cannot be verified. The closed overview uses one aligned column: the countdown and its secondary actions appear first, followed by equally sized stay cards and the instructions. Dates appear before the room and code placeholders. Cards use four columns on desktop and a 2×2 grid on mobile, including narrow screens. Guest-portal offer images fill the full width of their card on desktop and mobile. Height adjusts to each image’s original proportions, displaying the complete image without cropping.
Connect integrations
Integrations connect Solvotix with the systems your organization already uses—such as booking and property-management platforms, AI services and messaging channels. Activate an integration to share the right operational data and extend automation across third-party software. The first available modules are Property Management and WhatsApp. When no integrations are active, the page shows the illustration beside the heading and prompt in a split gradient card, like the Rooms empty state.
What to do
- 1How to activate an integrationOpen API / Integrations and select Manage integrations. Enable Property Management to use the Booking overview, or WhatsApp to use the messaging tools, then save/close and wait for the module to appear in the menu. Connecting a third-party PMS may require provider credentials, room mapping and booking rules such as default check-in/out times and code strategy. This setup can be complex; Solvotix Support will be happy to help configure and verify it. Open Integrations → Booking filter configuration → Add filter and select Automatic check-out after booking end. Read the explanation, then select Add filter to enable it manually. It checks out checked-in Mews and 3RPMS stays after their booking end, including already-expired stays. It is off by default. Remove the filter to stop future automatic check-outs and expiry retries; Guest Portal check-out continues independently. A saved filter does not confirm PMS completion: verify the reservation in the PMS. If saving fails, select Refresh to read the saved list before trying again. Open Integrations → Booking filter configuration → Add filter. Select “Push codes to 3RPMS on check-in”, read the explanation, then select Add filter to enable it. Add this filter to send the current booking code to 3RPMS when checked in, if it has not already been pushed. Off without this filter. Requires an enabled 3RPMS integration and a booking that has not checked out. No guest message is required. Existing checked-in bookings are eligible on the next sync. Remove the filter to stop future pushes; codes already sent remain in 3RPMS. Saving confirms the filter configuration only. Verify the code attachment on the booking in 3RPMS. If saving fails, refresh the list before retrying.
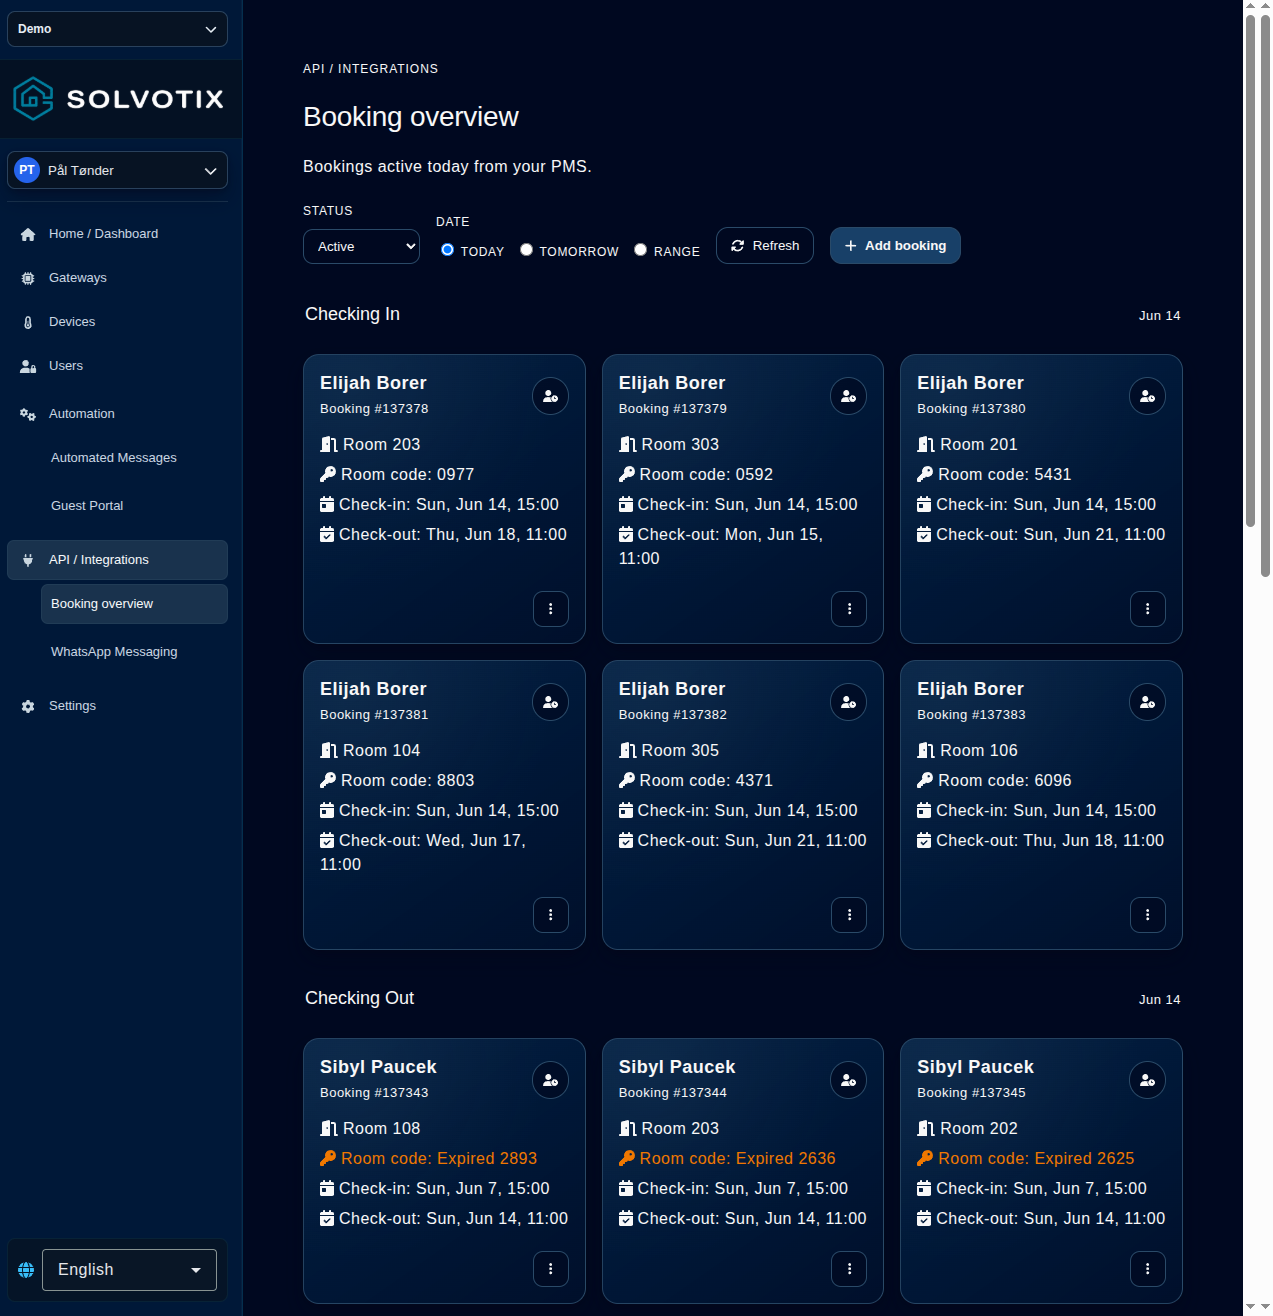
- 2How to create a bookingOpen API / Integrations > Booking overview and select Add booking. Enter the guest and stay details, choose the room, review the Checked In and Checked Out flags, then select Create booking. The portal creates the Booking ID automatically and reloads the overview. Confirm that the booking appears under the expected date before relying on its room access or message automations.
- 3What every booking field meansGuest Name identifies the reservation and is required. Email and Phone are optional contact routes used by guest communication and automated messages. Room is required and determines the mapped room, devices and access code. Check-in and check-out each require a date in dd.mm.yyyy and a 24-hour time in HH:mm; check-out cannot precede check-in. Checked In and Checked Out are operational flags, not date filters—mark them only when those events have occurred. Booking ID is generated and read-only; when editing, Source shows where the booking came from and Room Code shows its current access code.
- 4How to edit a bookingBooking filters appear as compact, read-only cards in their own panel, with Global filters first. Remove appears on hover, phone tap or keyboard focus. Configure filters opens the guide with all existing filters preselected and their saved settings loaded. Select filters to keep or add, and deselect those to remove. The guide has two steps: first select filters, then configure them using a vertical filter list. Click a filter to show its settings; on phones the list appears above the settings. Back returns to selection and preserves drafts. Save validates all selected filters and applies all changes together. On the final step, Save keeps unchanged filters, removes deselected filters and replaces changed filters with their updated versions together with new filters in one request. Selecting none and saving removes all filters. Cancel saves nothing. After a save error, Refresh reloads the current saved selection and settings before you retry. Step one displays a grouped checkbox list. Check or uncheck each filter directly; existing filters are preselected. In 3RPMS configuration, the enabled checkbox reflects the saved backend state and remains visible when disabled. Missing or unreadable settings do not enable it. Wait for loading to finish before editing. To enable a disabled integration, explicitly check the box, enter the API key and save; saving with the box unchecked never enables it. Filters shared by multiple integrations appear under each relevant integration, with no separate shared group. Automatic checkout appears under both Mews and 3RPMS. These entries share one selection and are configured and saved only once. Edit appears alongside Remove. Edit opens an overlay with the saved configuration for that filter. Save removes the existing entry and adds its updated version in one request, preserving the other filters. Cancel discards edits. After a save error, Refresh reloads the cards and closes the editor; reopen Edit to try again. Default check-in and check-out times appear next to each other, in that order, at the start of Global filters and in consecutive configuration steps. The saved-filter panel shows an integration’s group only while that integration is enabled. Shared filters appear only under enabled integrations. Global filters remain visible; hidden saved filters are retained and can still be managed through Configure filters. In step two, a short summary below each filter name in the left list shows its current draft configuration and updates as you edit. The step-two menu groups selected filters by integration, with Global filters first. Shared filters appear under each relevant integration and open the same configuration. Step two hides inactive integration groups, matching the main page. Hidden saved filters are retained when saving. Step one also hides inactive integration groups. Previously saved hidden filters remain selected and are preserved when saving.
- 5How to delete a bookingOpen the booking’s three-dot menu, select Delete booking, verify the Booking ID in the confirmation and confirm. The card is removed after the overview reloads. Deletion is not an archive operation and can affect access or automations tied to that booking, so delete only the intended reservation and correct an existing booking with Edit whenever possible.
- 6How to refresh a room codeOpen the booking’s three-dot menu and select Refresh room code. Choose Generate random for a new code, or enter a unique numeric code of 4–7 digits and select Set code. A conflict means the code already belongs to another room or booking. After success, reload and verify the displayed Room Code; mapped lock devices may still need time to receive the change, so do not give the code to a guest until delivery has been confirmed.
- 7How to filter bookingsUse Status to choose Active, All, Checked In or Checked Out. Active returns stays that have started and not yet ended for the selected date; Checked In and Checked Out use the explicit booking flags. Under Date choose Today, Tomorrow or Range; for Range select both start and end dates. Changing a control reloads the list, while Refresh repeats the current query. Use All when looking for a booking that its status flag would otherwise hide.
- 8How to read the booking groupsWith Status set to Active and one day selected, Checking In contains bookings whose check-in date is that day. Checking Out contains bookings ending that day, except same-day stays already shown under Checking In. Still Active contains stays spanning the selected day that neither begin nor end on it. These headings describe dates; they do not mean that the Checked In or Checked Out checkbox has been set.
- 9Review booking detailsOn the Property management page, each booking card shows the total amount and amount paid when the PMS supplies those values. Amounts are shown in the source system’s currency. Open the three-dot menu to find the booking ID. If a booking is marked checked out before its scheduled checkout time, the room-code field warns that the code expired because the guest checked out. The booking list is sorted naturally by room number; bookings in the same room are ordered by start time. When both values are available, payment is shown in one field as Amount: paid of total. The payment field turns green when the amount paid equals the total amount. The booking start and end are shown together without a label, using the numeric dd.MM HH:mm format. The guest name uses the full width at the top of each card in a fixed 15px font and remains on one line; hover it to see the full name if it is exceptionally long. The guest name is styled as the booking card header with a navy gradient and divider. The room appears below the name on the left, with check-in and arrived badges on the right. The room identifier is displayed without a Room label in a prominent 26px font. The portal viewport stays fixed while the booking content scrolls inside the application, avoiding a second page scrollbar. Missing guest name, payment amount, total amount, email or phone values are shown as — instead of hiding their fields. A missing room code is shown as Room code: Inactive; an available code is shown without the Room code label. Booking-card icons use consistent widths and spacing so all detail values align clearly. When a booking has a valid arrival timestamp, its Arrived badge also shows the local arrival time as HH:mm. Select Message sent on a booking card to load that booking’s successful delivery records and open an overlay with every delivered message, newest first, including date, channel, recipient and available email or SMS content. When a booking code is within its deactivation grace period, an orange warning icon appears at the bottom-right of the booking card. Click it to open a dialog explaining the configured grace period and early checkout. Close the dialog with Close or Escape. On mobile, booking cards fit the available width in a single column. Long contact details, room names and booking details wrap within the card; status badges and actions wrap when needed. Automated-message cards show email and SMS previews only for enabled delivery methods. The manual Send message dialog follows the selected template: email subject, address and preview appear only for email; phone and SMS preview appear only for SMS. Email content is rendered with line breaks and buttons directly in the dialog preview. Expand Edit — Email content to edit the HTML source; changes update the preview and are included when sending. SMS stays plain text. The dashboard event log renders Email message content as HTML, including line breaks, decoded characters and guest portal buttons. SMS messages and other event fields remain plain text. Add booking and Edit booking use the shared calendar and 24-hour hour/minute selectors for arrival and departure. Dates follow the selected tenant’s timezone and regional order, with dot separators. Saved timestamps remain ISO instants. The guest portal loads the booking tenant’s timezone before displaying dates and checking the departure day. It uses the same regional date order and 24-hour time. Missing, invalid or unavailable timezone values fall back to UTC.
- 10userManual.integrations.item11.titleOpen Integrations → Logging. Choose Today, 3 days or 7 days, and use Search payloads to search the selected range. The newest 40 logs appear first; scroll down or select Load more logs for each next group of 40. Refresh starts again with the newest logs, and Retry reloads a failed older page.
Rooms
Rooms connect bookings, guest access and physical devices so daily operations can be managed and verified in one place.
What to do
- 1Create a roomOpen Rooms and select Create room. Enter the guest-facing name and optionally a stable room ID; otherwise the portal creates the ID from the name. The overview sorts naturally, keeps numeric room names visible and places clear technical IDs behind Show all rooms.
- 2Add devices to a roomOpen a room card and choose Add device under Connected devices. Select an available device; it is saved immediately and uses the same card, status, readings and controls as the Devices page. Remove disconnects it from the room without deleting the device. Locks, temperature sensors and mouse traps then appear in the room overview.
- 3Add codes to a roomUnder Room access codes, select Add random code or enter unique 4–7 digit numeric codes separated by spaces or commas. Each code shows availability, assignment, booking and lock-delivery progress. A spinner means upload is pending, and a subrow names locks still missing the code. The visible page polls for changes; acceptance does not prove physical delivery.
- 4Change the room temperatureOpen the room and locate its thermostat or temperature device. Read the value and request a target on the shared device card. The command may remain queued for a sleeping or offline device, so follow its spinner and state and verify the thermostat confirms the change.
- 5Delete a roomOpen Property management → Room sensors, locate the room and select Delete room. Verify the room and tenant in the confirmation. Deletion is destructive; first review devices, codes, bookings and automation that depend on the room.
- 6Read bookings and indicatorsThe overview uses left icons for Checking out, Checking in and Current booking; a booking checking in or out today is not repeated as current. Date appears before guest name. On the right, blue means arrived and green means checked in, with checked in taking priority. A green check means paid, an orange dollar means unpaid, and no payment icon means unavailable data. Open the legend with Info and select a booking for dates, arrival, code, amounts, email, phone and message status. Subfooters show device queues and pending code uploads, polled once per second only while visible and after the previous request completes.
- 7Send messages from bookingsSelect a booking and then Send message. The same dialog as the booking overview opens with recipient, template, email, phone, subject and email/SMS content. Review the preview before sending. Success means accepted or queued, not necessarily delivered; the overlay updates immediately and a teal paper-plane icon appears on the booking row, while delivery records remain the final confirmation.
- 8Exclude digits from automatic room codesOpen API / Integrations → Property Management → Room sensors and select Filter code digits at the top. Step 1 selects one or more rooms; step 2 selects the digits that automatic generation and selection must avoid. Leave every digit clear to remove the rule, and leave at least two digits available. Saving is a physical access policy change: conflicting unused codes are removed and replaced, and lock updates are queued. Active booking codes remain until their booking releases them. The room cards show their excluded digits. A success message confirms saved data and queued work only, not delivery to the physical locks; use Code health to verify delivery. To remove an existing rule from one room, select its Excluded code digits indicator directly on the room card. The indicator disappears after the backend confirms the rule was cleared.
Administration and settings
Settings contain tenant-wide configuration and account administration.
What to do
- 1How to update tenant detailsMaintain tenant identity, address, website and IANA timezone. Enter contact name, contact phone number, contact email and diagnostic email in General settings, then select Save. Dates and datepicker fields follow the selected tenant’s timezone, not your browser’s region: European timezones show 20.09.2026, US timezones show 09.20.2026, and other supported regions use their regional date order. Times use the 24-hour clock. Missing or invalid timezones use UTC with day-first dates. Changing the tenant timezone updates the shared date displays and calendars; calendar-only dates do not shift to another day. The same date rules apply throughout the portal and CRM: bookings, rooms, cleaning, device histories, integration logs and sync ranges, customer and lead dates, API-user expiry, and offer PDFs. Date fields use a calendar; expiry also has separate 24-hour hour and minute selectors. Mexico (America/Cancun) uses day-first dates. Guest-page timestamps use UTC because the public guest API does not provide a tenant timezone.
- 2How to manage administratorsIn Administrators, select Create administrator, enter a name and email, then optionally select one or more roles: Janitor, Cleaning, Receptionist, Restricted or User. Leave all roles empty for unrestricted access. The same choices are available when editing an administrator.
- 3How to create system usersIn System users, select Create system user, enter a name, select Janitor, Cleaning, Receptionist, Restricted or User access (or leave the role unrestricted), and optionally set an expiration date. Save the token immediately; it is shown only after creation or rotation.
- 4How to configure messages and locksConfigure messaging, email branding, smart-lock master code and notifications.
- 5userManual.settings.item5.titleUnder Smart locks, use the tenant-wide toggle to enable or disable NFC readers. Saving queues the setting for applicable locks; it may not yet be applied physically.
- 6userManual.settings.item6.titleIn Settings → Smart locks, choose Generated room code length from 4 to 7 digits (default 4), then save. New and automatically selected codes use that length. Existing codes remain stored, but other lengths are skipped during automatic selection. Check each room’s code health to confirm lock upload; locks with a different code length can reject new codes.
- 7Manage saved Wi-Fi networksOpen Settings → Saved Wi-Fi networks for the selected tenant. This tab is available only to administrators with unrestricted access. Select Add network to open the overlay, enter the exact network name (SSID) and password, then Save. For a network without a password, select Open network. Each SSID has one entry; different buildings can use different entries. Passwords are masked in the list. Select Edit to open the overlay and change a password, and use Show password only when needed. To change an SSID, add the new network and delete the old entry. Select Delete and confirm to remove only the chosen network. The list is refreshed to verify changes; if verification fails, refresh and check before trying again. Saved credentials do not configure or disconnect existing gateways, and saving does not test the Wi-Fi connection.
- 8Email templates and logoOpen Settings → Messaging → Email branding (/home/settings#messaging). Choose Classic (centered), Modern (customizable header), Minimal (no frame) or Elegant (navy header and serif type). For Modern, choose Primary color for the header and accent and Secondary color for the outer background and main text; Reset colors restores the defaults. Use Upload logo for a PNG or JPEG up to 512 KiB and 2048 × 2048 pixels. The uploaded logo takes priority over Logo URL and is embedded in outgoing emails. Remove logo clears both sources. Edit the brand name, website, address and support contacts; review the live sample in Mobile view or Desktop view, then choose Save email branding. Changes apply to future branded emails for the selected tenant. The preview sends nothing, and actual email clients may render differently. If loading or saving fails, check the error before retrying. SMTP sender settings are configured separately.
Offers and PDFs
Create and review customer offers in the CRM.
What to do
- 1Check tax-exclusive line totalsOpen an offer and choose Preview PDF or Print / Save PDF. In the Hardware, Software and Monthly licensing tables, Total is the line price after discount and excluding tax. Tax is shown separately, and the summary identifies totals excluding and including tax.
Troubleshooting
Start with context, connection and pending work before changing configuration.
What to do
- 1When a page is missingConfirm the selected tenant, your role and whether the required module is active.
- 2When a device is offlineCheck gateway and device online state and last contact time.
- 3When a command does not runInspect pending queues or code-upload warnings and allow connected devices time to receive commands.
- 4When an integration does not synchronizeReconnect an expired integration session; contact support if the problem remains.